 measure of how bright (or dark) the midtones
of your image display. Fine tuning the gamma enables people who view your images in other
computers to see the colour values closer to those you intend.
measure of how bright (or dark) the midtones
of your image display. Fine tuning the gamma enables people who view your images in other
computers to see the colour values closer to those you intend.Calibration - why it is important
Before you even begin to scan your first picture, you should calibrate your monitor. This sounds awfully technical, and seems about as much fun as a visit to the dentist. But if you don't invest in the time to calibrate your monitor, you will produce work of inconsistent quality through time. Believe me. The objective of calibration is to ensure the accurate reproduction of colours. Calibrating your monitor ensure that the images you produce will appear consistent on other computers & monitors, or even with different image editing software on the same machine. In other words, you want to ensure that your blues do not turn to purple, or your yellows to orange when viewed on another monitor.
PhotoShop's monitor calibration routine is pretty basic, and
is subjective to the extent you have to eyeball the whole process. You adjust the gamma of
your monitor. In essence, the gamma is a  measure of how bright (or dark) the midtones
of your image display. Fine tuning the gamma enables people who view your images in other
computers to see the colour values closer to those you intend.
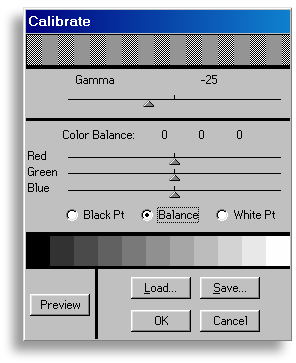
Before you start the calibration process, adjust the contrast and brightness controls of your monitor to a level you are comfortable with. Call up the monitor setup dialog box in PhotoShop [File > Colour Settings > Monitor Setup]. Select the brand of your monitor from PhotoShop's list of supported monitors. Don't be too unduly worried if you don't find your monitor listed. The default gamma value of 1.8 usually works fine. Next, click on the Calibrate button.
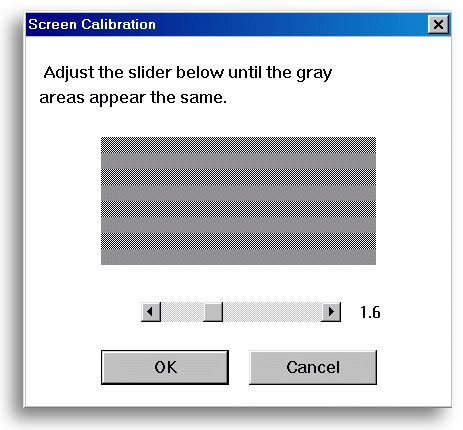
Try to get the gray stripes at the top to merge into a single shade of gray by moving the gamma slider bar to the left or right. This is where your eyeballing comes in. Don't worry if you can't get an exact match. As you can see from the picture on the left, the stripes blend together at a gamma value of -25. Next, you can adjust the colour balance of your monitor by tweaking the individual red, green and blue slider bars. If you have an image open in PhotoShop, you can preview the effects of your adjustments by clicking the Preview button. In my experience, adjusting the colour balance is usually not necessary, as the default settings work fine. After your have calibrated your monitor, click OK to exit. Make sure you do not fiddle with the contrast and brightness settings after calibrating!
If your scanner comes with a calibration program, you should
also run it to calibrate your scanner.  The process should be pretty much the same
as that for PhotoShop. A properly calibrated scanner produces more accurate colour scans,
and that saves us a lot of time by eliminating a whole lot of retouching and colour
correcting of the scanned image within PhotoShop.
Note
In the PC, PhotoShop's calibration settings affect only images viewed within PhotoShop. This isn't necessarily a bad thing, as it allows you to use another image editing program to check on the calibration settings you made. Use the other programs to call up the image you edited with PhotoShop. If it appears substantially different from the PhotoShop version, you'll need to recalibrate your settings.
Equipment | Memory | Resolution | Calibration | Moire | Quick Masks | File Formats
|
|